Schedule of Work
- Survey work: 1 week
- Setting out: 1 week
- Earthwork: 1-2 weeks
- Pile: 3 weeks
- Pile cap: 2 weeks
- Stump: 2 weeks
- Ground Beam: 2 weeks
- Slab: 2 weeks
- Column: 2 weeks
- Beam: 2 weeks
- Staircase: 2 weeks
- Wall: 2 weeks
- Plastering: 2 weeks
- Slab: 2 weeks
- Column: 2 weeks
- Beam: 2 weeks
- Staircase: 2 weeks
- Wall: 2 weeks
- Plastering: 2 weeks
- Slab: 2 weeks
- Column: 2 weeks
- Beam: 2 weeks
- Staircase: 2 weeks
- Wall: 2 weeks
- Plastering: 2 weeks
Utility
- Electrical Supply: 1 week
- Water Supply: 1 week
- Door and Windows Total: 2 week
Finishes
- 1st floor Kitchen Plumbing: 1 week
- Plastering interiors 1st floor: 2 week
- Plastering Interiors 2nd floor: 1 week
- Skidding floors Painting – first coat: 2 week
- Painting – second coat: 2 week
- Sanitary fitting of bathroom and kitchen: 1 week
- Electrical fitting: 1 week .
Total: 57 week
WEEK 1
Activity 1: Site survey
Duration: 7 days
Materials: –
Equipment:-
Skilled Workers: Backhoe Loader Operator(1), General workers(4), Lorry driver(1)
Technical Information: Analysis is done to the construction site by surveyor and further planning and advices to the site for construction preparation and development.
Activity 2: Mobilization
Duration: 2-3 days
Materials: Machineries
Equipment: Lorries(2), mobile crane(1), backhoe loaders(1), Hydraulic Piling Hammer(1), excavator(1), compactor (1), boring machine(1)
Skilled Workers: lorry drivers(2), excavator operator(1), backhoe loader operator(1), Hydraulic Piling Hammer operator(1), compactor operators (1), boring machine operator(1)
Technical Information: Machineries required is delivered to the site and wait for job to be executed.
Activity 3: Site Clearing
Duration: 7 days
Materials: –
Equipment: Backhoe Loader, chainsaw, lorry truck (carry earth & plants away)
Skilled Workers: Backhoe Loader Operator(1), General workers(4), Lorry driver(1)
Technical Information: Excavation of unfavorable soil and substances such as stones and tree barks. Initial leveling is done for the preparation of earthwork.
WEEK 2
Activity 1: Hoarding (setting out), staking (plan boundary)


Duration: 5 days
Materials: blue metal decks, nails, wooden pegs, planks, stakes, Builder’s line
Equipment: hammer, measuring tape, theodolite, Dummy level, construction sign board
Skilled Workers: quantity surveyor (2), general workers (4)
Technical Information: Boundary of the construction site is precisely measured and borders the site where the construction takes place. The site is marked with gridlines with a setback of 20 feet from the road and 10 feet for the porch according to UBBL and the location of the pile is marked.
Activity 2: Earthwork
Duration: 7 days
Materials: –
Equipment: excavator, compactor
Skilled Workers: Excavator Operator (1), Compactor Operator (1)
Technical Information: Removal of top soil and land leveling. The land is excavated to around 300mm of the top soil. Keep away or stored well for reuse due to its high water retentive characteristic.
WEEK 3
Activity 1: Earthwork (continued)
Duration: 7 days (continued from last week)
Materials: –
Equipment: excavator, compactor
Skilled Workers: Excavator Operator (1), Compactor Operator (1)
Technical information: Removal of top soil and land leveling. The land is excavated to around 300mm of the top soil. Keep away or stored well for reuse due to its high water retentive characteristic.
Activity 2: Piling (Grid 13- Grid 15)


Duration: 10-14 days
Materials: Reinforced concrete piles, Concrete Grade 30, Reinforcement, wooden formworks
Equipment: Hydraulic Piling Hammer(1), Rebar Bending machine(1), Boring Machine(1), cement concrete mixer (1), hacker (1)
Skilled Workers: Hydraulic Piling Hammer Operator (1), Boring Machine Operator (1), Rebar Bender (1), General construction workers (6)
Technical Information: The depth/length of the piles is depending on the soil condition based on the soil test, after that the engineers will decide the pile length to fit the soil condition of the site, based on the result of the test. Difference in height of the piles will be cut below cap using hacker. The rebar connected to the piles are then removed and left for the joining of capping reinforcement. Soil specimen is taken for soil test experiment to determine the length of the pile. The pile integrity test (Load test) is done to determine the strength to support the load.
Week 4
Activity 1: Piling (Grid 8 – Grid 12)


Duration: 10-14 days
Materials: Reinforced concrete piles, Concrete Grade 30, Reinforcement, wooden formworks
Equipment: Hydraulic Piling Hammer(1), Rebar Bending machine(1), Boring Machine(1), cement concrete mixer (1)
Skilled Workers: Hydraulic Piling Hammer Operator (1), Boring Machine Operator (1), Rebar Bender (1), General construction workers (6)
Technical Information: The depth/length of the piles is depending on the soil condition based on the soil test, after that the engineers will decide the pile length to fit the soil condition of the site, based on the result of the test. Difference in height of the piles will be cut below cap using hacker. The rebar connected to the piles are then removed and left for the joining of capping reinforcement. Soil specimen is taken for soil test experiment to determine the length of the pile. The pile integrity test (Load test) is done to determine the strength to support the load.
Week 5
Activity 1: Leveling of Piles before capping
Duration: 3 days
Materials: Reinforced concrete piles, Concrete Grade 30, Reinforcement, wooden formworks
Equipment: Hydraulic Piling Hammer(1), Rebar Bending machine(1), Boring Machine(1), cement concrete mixer (1)
Skilled Workers: Hydraulic Piling Hammer Operator (1), Boring Machine Operator (1), Rebar Bender (1), General construction workers (6)
Technical Information: When the piling is penetrated into the soil, the piles are in different height. The piles need to be cut before cap by using hacker. The rebar are removed and then the capping reinforcement are applied.
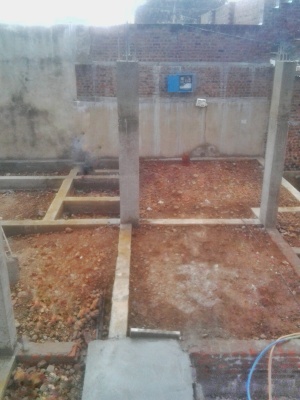
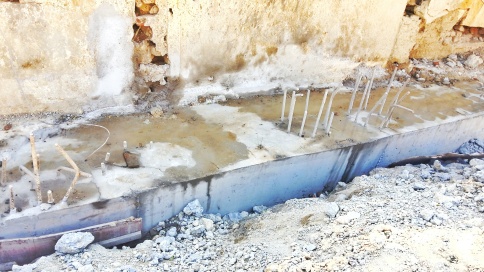
Activity 2: Pile capping


Duration: 7 -14 days
Materials: Reinforced concrete piles, Concrete Grade 30, Reinforcement, wooden formworks
Equipment: Hydraulic Piling Hammer(1), Rebar Bending machine(1), Boring Machine(1), cement concrete mixer (1)
Skilled Workers: Hydraulic Piling Hammer Operator (1), Boring Machine Operator (1), Rebar Bender (1), General construction workers (6)
Technical Information: pile caps takes around 2 weeks to reach its maximum strength, but usually it can be done after it is left curing for about a week. Stumping can be constructed around that time.
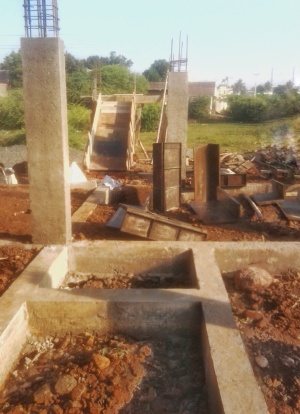
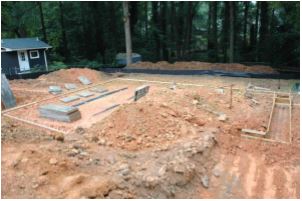
Week 6
Activity 1: Stump from Pile caps


Duration:7 days-14 days
Materials: Concrete Grade 30, reinforcements, timber formworks.
Equipment: Concrete Vibrator(1), Rebar bending machine(1), tablesaw(1)
Skilled Workers: Land Surveyor (1), Carpenter(2), Bar Bender (1), General worker (2)
Technical Information: After pilings , the land surveyor will identity of the height required of the stumps and thereafter construct the stumps based on the data. Steel rebar are bent into cage form, with starter bar protruding upward to connect for latter construction of columns. Constructed the same way as the pile capping, the stumps are left for curing in order to achieve its required structural strength before the construction of the beams. It is left to cure for a week.
WEEK 7
Activity 1: Ground Beam (Grid 13-Grid 17)


Duration: 14 days
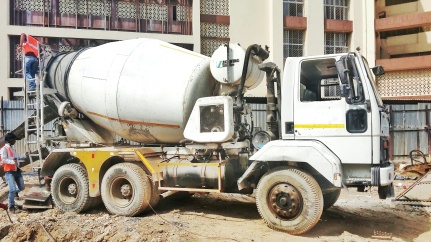
Materials: Concrete Grade 30, reinforcements, timber formworks,
Equipment: Concrete Vibrator(1), Rebar bending machine(1), table saw(1), concrete mixer(1),
Skilled Workers: Carpenter(2), Rebar Bender (1), General worker (3)
Technical information: Formworks is constructed with steel rebar reinforcement and starter bar. Thereafter a mixture of concrete with aggregates and cement is then pour into the casting form and left for curing around a week time.
WEEK 8
Activity 1: Ground Beam (Grid 8-Grid 13)


Duration: 14 days
Materials: Concrete Grade 30, reinforcements, timber formworks,
Equipment: Concrete Vibrator(1), Rebar bending machine(1), table saw(1), concrete mixer(1),
Skilled Workers: Carpenter(2), Rebar Bender (1), General worker (3)
Technical information: Formworks is constructed with steel rebar reinforcement and starter bar. Thereafter a mixture of concrete with aggregates and cement is then pour into the casting form and left for curing around a week time.
Week 9
Activity 1: Ground floor slab (grid 12- grid 17)


Duration: 14 days
Materials: Concrete Grade 30, reinforcements, timber formworks, Damp Proof Membrane (DPM), Rigid Floor Insulation, screed plank
Equipment: Concrete Vibrator(1), Rebar bending machine(1), table saw(1), concrete mixer(1),
Skilled Workers: Carpenter(2), Rebar Bender (1), General worker (3)
Technical Information: The Ground slab is cast after beam, the workers can proceed to next construction during curing time. Formworks is constructed with steel rebar reinforcement and starter bar. Thereafter a mixture of concrete with aggregates and cement is then pour into the casting form and left for curing around a week time. DPM is laid on the concrete and screeded with long even plank.
Week 10
Activity 1: Ground floor slab (grid 8 – 12 ,continued from the first )


Duration: 14 days
Materials: Concrete Grade 30, reinforcements, timber formworks, Damp Proof Membrane (DPM), Rigid Floor Insulation, screed plank
Equipment: Concrete Vibrator(1), Rebar bending machine(1), table saw(1), concrete mixer(1),
Skilled Workers: Carpenter(2), Rebar Bender (1), General worker (3)
Technical Information: The Ground slab is cast after beam, the workers can proceed to next construction during curing time. Formworks is constructed with steel rebar reinforcement and starter bar. Thereafter a mixture of concrete with aggregates and cement is then pour into the casting form and left for curing around a week time. DPM is laid on the concrete and screeded with long even plank.
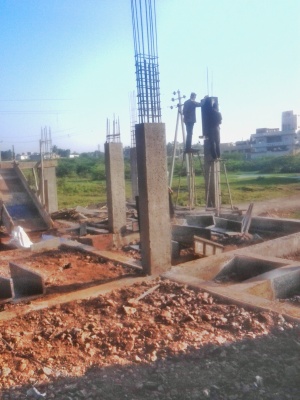
Week 11
Activity 1: Ground Floor Columns (Grid 12 – Grid 15)


Duration: 14 Days
Materials: Concrete Grade 30, reinforcement, timber formwork
Equipment: Concrete Mixer(1), Concrete vibrator (1) , bar bending machine (1), table saw
Skilled worker: Carpenter (2) , bar bender (2), general worker (4)
Technical information: Same as the construction of beams, the formworks is constructed with steel rebar reinforcement and starter bar. Thereafter a mixture of concrete with aggregates and cement is then pouring into the casting form and left for curing around a week time.
Week 12
Activity 1: Ground Floor Columns (Grid 8-Grid 11)
Duration: 14 Days
Materials: Concrete Grade 30, reinforcement, timber formwork
Equipment: Concrete Mixer(1), Concrete vibrator (1) , bar bending machine (1), table saw
Skilled worker: Carpenter (2) , bar bender (2), general worker (4)
Technical information: Same as the construction of beams, the formworks is constructed with steel rebar reinforcement and starter bar. Thereafter a mixture of concrete with aggregates and cement is then pouring into the casting form and left for curing around a week time.


Activity 2: First Floor Beam (Grid 12- Grid 17) , first half
Duration: 14 Days
Materials: Concrete Grade 30, reinforcement, timber formwork
Equipment: Concrete Mixer(1), Concrete vibrator (1) , bar bending machine (1), table saw
Skilled worker: Carpenter (2) , bar bender (2), general worker (4)
Technical information: The formworks is constructed with steel rebar reinforcement and starter bar. Thereafter a mixture of concrete with aggregates and cement is then pouring into the casting form and left for curing around a week time.
Week 13
Activity 2: First Floor Beam (Grid 8 – Grid 12) , second half


Duration: 14 Days
Materials: Concrete Grade 30, reinforcement, timber formwork
Equipment: Concrete Mixer(1), Concrete vibrator (1) , bar bending machine (1), table saw
Skilled worker: Carpenter (2) , bar bender (2), general worker (4)
Technical information: The formworks is constructed with steel rebar reinforcement and starter bar. Thereafter a mixture of concrete with aggregates and cement is then pouring into the casting form and left for curing around a week time.
Week 14
Activity 1: First Floor Slab (Grid 13-grid 17)


Duration: 14 days
Materials: Concrete Grade 30, reinforcements, timber formworks, Damp Proof Membrane (DPM), Rigid Floor Insulation, screed plank
Equipment: Concrete Vibrator(1), Rebar bending machine(1), table saw(1), concrete mixer(1),
Skilled Workers: Carpenter(2), Rebar Bender (1), General worker (3)
Technical Information: The Ground slab is cast after beams, the workers can proceed to next construction during curing time. Formworks is constructed with steel rebar reinforcement and starter bar. Thereafter a mixture of concrete with aggregates and cement is then pour into the casting, screeded with plank and then left for curing around a week time. A layer of protection is laid on top of the concrete during curing.
Week 15
Activity 1: First Floor Slab ( second half floor)


Duration: 14 days
Materials: Concrete Grade 30, reinforcements, timber formworks, Damp Proof Membrane (DPM), Rigid Floor Insulation, screed plank
Equipment: Concrete Vibrator(1), Rebar bending machine(1), table saw(1), concrete mixer(1),
Skilled Workers: Carpenter(2), Rebar Bender (1), General worker (3)
Technical Information: The Ground slab is cast after beams, the workers can proceed to next construction during curing time. Formworks is constructed with steel rebar reinforcement and starter bar. Thereafter a mixture of concrete with aggregates and cement is then pour into the casting, screeded with plank and then left for curing around a week time. A layer of protection is laid on top of the concrete during curing.
Week 16
Activity 1: first floor column (grid 12-grid 17), first half
Duration: 14 Days
Materials: Concrete Grade 30, reinforcement, timber formwork
Equipment: Concrete Mixer(1), Concrete vibrator (1) , bar bending machine (1), table saw
Skilled worker: Carpenter (2) , bar bender (2), general worker (4)
Technical information: Same as the construction of beams, the formwork is constructed with steel rebar reinforcement and starter bar. Thereafter a mixture of concrete with aggregates and cement is then pouring into the casting form and left for curing around a week time.


Activity 2: Ground Floor Staircase (to level 1)
Duration: 8-14 days
Materials: Concrete Grade 30, reinforcements, timber formworks,
Equipment: Concrete Vibrator(1), Rebar bending machine(1), table saw(1), concrete mixer(1), spirit level.
Skilled Workers: Carpenter (2), Rebar Bender (1), General worker (3)
Technical Information: The formworks of the stairs is constructed with steel rebar reinforcement and starter bar. Thereafter a mixture of concrete with aggregates and cement is then pouring into the casting form and left for curing around a week time. A concrete test is taken to check the strength of the casting after it was left to cure for a week.
Week 17
Activity 1: first floor column (grid 8-grid 12), second half
Duration: 14 Days
Materials: Concrete Grade 30, reinforcement, timber formwork
Equipment: Concrete Mixer(1), Concrete vibrator (1) , bar bending machine (1), table saw
Skilled worker: Carpenter (2) , bar bender (2), general worker (4)
Technical information: Same as the construction of beams, the formworks is constructed with steel rebar reinforcement and starter bar. Thereafter a mixture of concrete with aggregates and cement is then pouring into the casting form and left for curing around a week time.
Activity 2: Second Floor Beam (Grid 12- Grid 17) , first half
Duration: 14 Days
Materials: Concrete Grade 30, reinforcement, timber formwork
Equipment: Concrete Mixer(1), Concrete vibrator (1) , bar bending machine (1), table saw
Skilled worker: Carpenter (2) , bar bender (2), general worker (4)
Technical information: The formworks is constructed with steel rebar reinforcement and starter bar. Thereafter a mixture of concrete with aggregates and cement is then pouring into the casting form and left for curing around a week time.


Activity 3: Ground Floor Staircase (to level 1, continued)
Duration: 8-14 days
Materials: Concrete Grade 30, reinforcements, timber formworks,
Equipment: Concrete Vibrator(1), Rebar bending machine(1), table saw(1), concrete mixer(1), spirit level.
Skilled Workers: Carpenter (2), Rebar Bender (1), General worker (3)
Technical Information: The formworks of the stairs is constructed with steel rebar reinforcement and starter bar. Thereafter a mixture of concrete with aggregates and cement is then pouring into the casting form and left for curing around a week time. A concrete test is taken to check the strength of the casting after it was left to cure for a week.
Week 18
Activity 1: Second Floor Beam (Grid 8- Grid 12) , second half

Duration: 14 Days
Materials: Concrete Grade 30, reinforcement, timber formwork
Equipment: Concrete Mixer(1), Concrete vibrator (1) , bar bending machine (1), table saw
Skilled worker: Carpenter (2) , bar bender (2), general worker (4)
Technical information: The formworks is constructed with steel rebar reinforcement and starter bar. Thereafter a mixture of concrete with aggregates and cement is then pouring into the casting form and left for curing around a week time.
Week 19
Activity 1: Second Floor Slab (first half)


Duration: 14 days
Materials: Concrete Grade 30, reinforcements, timber formworks, Damp Proof Membrane (DPM), Rigid Floor Insulation, screed plank
Equipment: Concrete Vibrator(1), Rebar bending machine(1), table saw(1), concrete mixer(1),
Skilled Workers: Carpenter(2), Rebar Bender (1), General worker (3)
Technical Information: The Ground slab is cast after beams, the workers can proceed to next construction during curing time. Formworks is constructed with steel rebar reinforcement and starter bar. Thereafter a mixture of concrete with aggregates and cement is then pour into the casting, screeded with plank and then left for curing around a week time. A layer of protection is laid on top of the concrete during curing.
Week 20
Activity 1: Second Floor Slab (second half)


Duration: 14 days
Materials: Concrete Grade 30, reinforcements, timber formworks, Damp Proof Membrane (DPM), Rigid Floor Insulation, screed plank
Equipment: Concrete Vibrator(1), Rebar bending machine(1), table saw(1), concrete mixer(1),
Skilled Workers: Carpenter(2), Rebar Bender (1), General worker (3)
Technical Information: The Ground slab is cast after beams, the workers can proceed to next construction during curing time. Formworks is constructed with steel rebar reinforcement and starter bar. Thereafter a mixture of concrete with aggregates and cement is then pour into the casting, screeded with plank and then left for curing around a week time. A layer of protection is laid on top of the concrete during curing.
Week 21
Activity 1: Second floor column (grid 8-grid 13)
Duration: 14 Days
Materials: Concrete Grade 30, reinforcement, timber formwork
Equipment: Concrete Mixer(1), Concrete vibrator (1) , bar bending machine (1), table saw
Skilled worker: Carpenter (2) , bar bender (2), general worker (4)
Technical information: Same as the construction of beams, the formworks is constructed with steel rebar reinforcement and starter bar. Thereafter a mixture of concrete with aggregates and cement is then pouring into the casting form and left for curing around a week time.


Activity 2: First Floor Staircase (to level 2)
Duration: 8-14 days
Materials: Concrete Grade 30, reinforcements, timber formworks,
Equipment: Concrete Vibrator(1), Rebar bending machine(1), table saw(1), concrete mixer(1), spirit level.
Skilled Workers: Carpenter (2), Rebar Bender (1), General worker (3)
Technical Information: The formworks of the stairs is constructed with steel rebar reinforcement and starter bar. Thereafter a mixture of concrete with aggregates and cement is then pouring into the casting form and left for curing around a week time. A concrete test is taken to check the strength of the casting after it was left to cure for a week.
Week 22
Activity 1: Roof floor Beams (Grid 8- Grid 13) , All floor


Duration: 14 Days Materials: Concrete Grade 30, reinforcement, timber formwork
Equipment: Concrete Mixer(1), Concrete vibrator (1) , bar bending machine (1), table saw
Skilled worker: Carpenter (2) , bar bender (2), general worker (4)
Technical information: The formworks is constructed with steel rebar reinforcement and starter bar. Thereafter a mixture of concrete with aggregates and cement is then pouring into the casting form and left for curing around a week time.
Week 23
Activity 1: third floor Slab (all floor)


Duration: 14 days
Materials: Concrete Grade 30, reinforcements, timber formworks, Damp Proof Membrane (DPM), Rigid Floor Insulation, screed plank
Equipment: Concrete Vibrator(1), Rebar bending machine(1), table saw(1), concrete mixer(1),
Skilled Workers: Carpenter(2), Rebar Bender (1), General worker (3)
Technical Information: The Ground slab is cast after beams, the workers can proceed to next construction during curing time. Formworks is constructed with steel rebar reinforcement and starter bar. Thereafter a mixture of concrete with aggregates and cement is then pour into the casting, screeded with plank and then left for curing around a week time. A layer of protection is laid on top of the concrete during curing.
WEEK 24
Activity 1: Brickwalls Ground Level (Grid 3- 4)


Duration: 15-20 days
Materials: 100 mm x 215 mm x 75 mm Clay Bricks, Cement mortar, Builder’s line, Wire mesh reinforcement
Equipment: Wheel barrow (2), Shovel (2), Groovers (5), Edges (5)
Skilled Workers: General Workers (6)
Technical Information: Builder’s line is used to alight the walls during stacking of bricks and construction of the wall. The clay bricks are bonded with mortar and stack together with specific bonding pattern. Wire mesh is laid on the bricks in certain layer interval as reinforcement and stiffer will be constructed between walls to strengthen the walls.
WEEK 25
Activity 1: Brickwalls Ground Level (Grid 4-5)


Duration: 15-20 days
Materials: 100 mm x 215 mm x 75 mm Clay Bricks, Cement mortar, Builder’s line, Wire mesh reinforcement
Equipment: Wheel barrow (2), Shovel (2), Groovers (5), Edges (5)
Skilled Workers: General Workers (6)
Technical Information: Builder’s line is used to alight the walls during stacking of bricks and construction of the wall. The clay bricks are bonded with mortar and stack together with specific bonding pattern. Wire mesh is laid on the bricks in certain layer interval as reinforcement and stiffer will be constructed between walls to strengthen the walls.
Week 26
Activity 1: Brickwalls Ground Level (Grid 5-6)


Duration: 15-20 days
Materials: 100 mm x 215 mm x 75 mm Clay Bricks, Cement mortar, Builder’s line, Wire mesh reinforcement
Equipment: Wheel barrow (2), Shovel (2), Groovers (5), Edges (5)
Skilled Workers: General Workers (6)
Technical Information: Builder’s line is used to alight the walls during stacking of bricks and construction of the wall. The clay bricks are bonded with mortar and stack together with specific bonding pattern. Wire mesh is laid on the bricks in certain layer interval as reinforcement and stiffer will be constructed between walls to strengthen the walls.
Week 27
Activity 1: Brickwall First Level (Grid 3-4)


Duration: 15-20 days
Materials: 100 mmx 215 mm x 75 mm Clay Bricks, Cement mortar, Builder’s line, Wire mesh reinforcement
Equipment: Wheel barrow (2), Shovel (2), Groovers (5), Edges (5)
Skilled Workers: General Workers (6)
Technical Information: Builder’s line is used to alight the walls during stacking of bricks and construction of the wall. The clay bricks are bonded with mortar and stack together with specific bonding pattern. Wire mesh is laid on the bricks in certain layer interval as reinforcement and stiffer will be constructed between walls to strengthen the walls.
Week 28
Activity 1: Brickwall First Level (Grid 4-5)
Duration: 15-20 days
Materials: 100 mm x 215 mm x 75 mm Clay Bricks, Cement mortar, Builder’s line, Wire mesh reinforcement
Equipment: Wheel barrow (2), Shovel (2), Groovers (5), Edges (5)
Skilled Workers: General Workers (6)
Technical Information: Builder’s line is used to alight the walls during stacking of bricks and construction of the wall. The clay bricks are bonded with mortar and stack together with specific bonding pattern. Wire mesh is laid on the bricks in certain layer interval as reinforcement and stiffer will be constructed between walls to strengthen the walls.
Week 29
Activity 1: Brickwall First Level (Grid 4-5)

Duration: 15-20 days
Materials: 100 mm x 215 mm x 75 mm Clay Bricks, Cement mortar, Builder’s line, Wire mesh reinforcement
Equipment: Wheel barrow (2), Shovel (2), Groovers (5), Edges (5)
Skilled Workers: General Workers (6)
Technical Information: Builder’s line is used to alight the walls during stacking of bricks and construction of the wall. The clay bricks are bonded with mortar and stack together with specific bonding pattern. Wire mesh is laid on the bricks in certain layer interval as reinforcement and stiffer will be constructed between walls to strengthen the walls.
Week 30
Activity 1: Brickwall Second Level (Grid 3-4a)


Duration: 15-20 days
Materials: 100 mm x 215 mm x 75 mm Clay Bricks, Cement mortar, Builder’s line, Wire mesh reinforcement
Equipment: Wheel barrow (2), Shovel (2), Groovers (5), Edges (5)
Skilled Workers: General Workers (6)
Technical Information: Builder’s line is used to alight the walls during stacking of bricks and construction of the wall. The clay bricks are bonded with mortar and stack together with specific bonding pattern. Wire mesh is laid on the bricks in certain layer interval as reinforcement and stiffer will be constructed between walls to strengthen the walls.
Week 31
Activity 1: Brickwall Second Level (Grid 4a-5)


Duration: 15-20 days
Materials: 100 mm x 215 mm x 75 mm Clay Bricks, Cement mortar, Builder’s line, Wire mesh reinforcement
Equipment: Wheel barrow (2), Shovel (2), Groovers (5), Edges (5)
Skilled Workers: General Workers (6)
Technical Information: Builder’s line is used to alight the walls during stacking of bricks and construction of the wall. The clay bricks are bonded with mortar and stack together with specific bonding pattern. Wire mesh is laid on the bricks in certain layer interval as reinforcement and stiffer will be constructed between walls to strengthen the walls.
Week 32
Activity 1: Brickwall Second Level (Grid 13 -17)

Duration: 15-20 days
Materials: 100 mm x 215 mm x 75 mm Clay Bricks, Cement mortar, Builder’s line, Wire mesh reinforcement
Equipment: Wheel barrow (2), Shovel (2), Groovers (5), Edges (5)
Skilled Workers: General Workers (6)
Technical Information: Builder’s line is used to alight the walls during stacking of bricks and construction of the wall. The clay bricks are bonded with mortar and stack together with specific bonding pattern. Wire mesh is laid on the bricks in certain layer interval as reinforcement and stiffer will be constructed between walls to strengthen the walls.
Activity 2: Façade roof slab

Duration: 14 days
Materials: Concrete Grade 30, reinforcements, timber formworks, Damp Proof Membrane (DPM), Rigid Floor Insulation, screed plank
Equipment: Concrete Vibrator(1), Rebar bending machine(1), table saw(1), concrete mixer(1),
Skilled Workers: Carpenter(2), Rebar Bender (1), General worker (3)
Technical Information: The Ground slab is cast after beam, the workers can proceed to next construction during curing time. Formworks is constructed with steel rebar reinforcement and starter bar. Thereafter a mixture of concrete with aggregates and cement is then pour into the casting form and left for curing around a week time. DPM is laid on the concrete and screeded with long even plank.
Week 33
Activity 1: Framing (ground floor)

Duration: 7 days
Materials: Openings wooden frame (for door and windows)
Equipment: Spirit level, Measuring tape
Skilled Workers: General Workers (4)
Technical Information: The opening frames are constructed in position and align after the brick wall is done. Architrave is added after the door/window frame is added.
Activity 2: Incoming Electrical Circuit Supply Installation
Duration: 10-14 days
Materials: Copper Cables (different sizes), Kilowatt hour meter
Equipment: Voltmeter, Ammeter, Plyers, Screws and nuts,
Skilled Workers: Electric Technician (2), Plumbers (2)
Technical Information: Incoming electricity cables are brought into the house and connected to a circuit box in the house to facilitate the plumbing works later on.
Week 34
Activity 1: Framing (First floor)

Duration: 7 days
Materials: Openings wooden frame (for door and windows)
Equipment: Spirit level, Measuring tape
Skilled Workers: General Workers (4)
Technical Information: The opening frames are constructed in position and align after the brick wall is done. Architrave is added after the door/window frame is added.
Activity 2: Incoming Electrical Circuit Supply Installation
Duration: 10-14 days (continued)
Materials: Copper Cables (different sizes), Kilowatt hour meter
Equipment: Voltmeter, Ammeter, Plyers, Screws and nuts,
Skilled Workers: Electric Technician (2), Plumbers (2)
Technical Information: Incoming electricity cables are brought into the house and connected to a circuit box in the house to facilitate the plumbing works later on.
Week 35
Activity 1: Framing (Second floor)

Duration: 7 days
Materials: Openings wooden frame (for door and windows)
Equipment: Spirit level, Measuring tape
Skilled Workers: General Workers (4)
Technical Information: The opening frames are constructed in position and align after the brick wall is done. Architrave is added after the door/window frame is added.
Activity 2: Ground Floor Plumbing (First Fix)

Duration: 14 days
Materials: Copper Cables (different sizes), PVC pipes, socket box
Equipment: Voltmeter, Ammeter, Plyers, Screws and nuts, Hacking machine
Skilled Workers: Electricians(2), Plumbers (2)
Technical Information: Technicians will determine the location of the sockets according to the engineering blue print. The brick wall is hacked to accommodate the wiring pipe from the top to the ground according UBBL requirements. The wall sockets will be installed after the wiring is done.
Week 36
Activity 1: First Floor Plumbing (First Fix)
Duration: 14 days
Materials: Copper Cables (different sizes), PVC pipes, socket box
Equipment: Voltmeter, Ammeter, Plyers, Screws and nuts, Hacking machine
Skilled Workers: Electricians(2), Plumbers (2)
Technical Information: Technicians will determine the location of the sockets according to the engineering blue print. The brick wall is hacked to accommodate the wiring pipe from the top to the ground according UBBL requirements. The wall sockets will be installed after the wiring is done.
Week 37
Activity 1: First Floor Plumbing (First Fix)
Duration: 14 days
Materials: Copper Cables (different sizes), PVC pipes, socket box
Equipment: Voltmeter, Ammeter, Plyers, Screws and nuts, Hacking machine
Skilled Workers: Electricians(2), Plumbers (2)
Technical Information: Technicians will determine the location of the sockets according to the engineering blue print. The brick wall is hacked to accommodate the wiring pipe from the top to the ground according UBBL requirements. The wall sockets will be installed after the wiring is done.
Activity 2: Second Floor Plumbing (First Fix)
Duration: 14 days
Materials: Copper Cables (different sizes), PVC pipes, socket box
Equipment: Voltmeter, Ammeter, Plyers, Screws and nuts, Hacking machine
Skilled Workers: Electricians(2), Plumbers (2)
Technical Information: Technicians will determine the location of the sockets according to the engineering blue print. The brick wall is hacked to accommodate the wiring pipe from the top to the ground according UBBL requirements. The wall sockets will be installed after the wiring is done.
Activity 3: Plumbing (Sanitary and Kitchen)
Duration: 14 days
Materials: Copper Cables (different sizes), PVC pipes, socket box
Equipment: Voltmeter, Ammeter, Plyers, Screws and nuts, Hacking machine
Skilled Workers: Electricians(2), Plumbers (2)
Technical Information: Technicians will determine the location of the sockets according to the engineering blue print. The brick wall is hacked to accommodate the wiring pipe from the top to the ground according UBBL requirements. The wall sockets will be installed after the wiring is done.
Week 38
Activity 1: Plumbing (Sanitary and Kitchen)
Duration: 14 days
Materials: Copper Cables (different sizes), PVC pipes, socket box
Equipment: Voltmeter, Ammeter, Plyers, Screws and nuts, Hacking machine
Skilled Workers: Electricians(2), Plumbers (2)
Technical Information: Technicians will determine the location of the sockets according to the engineering blue print. The brick wall is hacked to accommodate the wiring pipe from the top to the ground according UBBL requirements. The wall sockets will be installed after the wiring is done.
Week 39
Activity 1: Ground floor Wall Plastering (Grid 1-Grid 3)


Duration: 14-21 days (interior and exterior)
Materials: cement plaster, skim coat
Equipment: buckets, cement spatula trowels, groovers, edgers, planks, sponges, scaffolding, plaster spray
Skilled Workers: general workers (2), plasterers(3)
Technical information: The plaster layer is not more than half inches, and left for drying about 7 days before the finishing is applied. The first coating thickness is around 1/2 to 3/4 inches while the finishing coat will be around 3/16 inches thick. The surface of the rendering preferably wetted before application of plastering. Rough surface plastering is usually used outdoor to resist harsh weathering. Smooth surface plastering with pores and easily defected characteristic is preferably used indoor.
Week 40
Activity 1: Ground floor wall plastering (Grid 4-4a)


Duration: 14-21 days (interior and exterior)
Materials: cement plaster, skim coat
Equipment: buckets, cement spatula trowels, groovers, edgers, planks, sponges, scaffolding, plaster spray
Skilled Workers: general workers (2), plasterers(3)
Technical information: The plaster layer is not more than half inches, and left for drying about 7 days before the finishing is applied. The first coating thickness is around 1/2 to 3/4 inches while the finishing coat will be around 3/16 inches thick. The surface of the rendering preferably wetted before application of plastering. Rough surface plastering is usually used outdoor to resist harsh weathering. Smooth surface plastering with pores and easily defected characteristic is preferably used indoor.
Week 41
Activity 1: Ground floor plastering (Grid 4a-6)
Duration: 14-21 days (interior and exterior)
Materials: cement plaster, skim coat
Equipment: buckets, cement spatula trowels, groovers, edgers, planks, sponges, scaffolding, plaster spray
Skilled Workers: general workers (2), plasterers(3)
Technical information: The plaster layer is not more than half inches, and left for drying about 7 days before the finishing is applied. The first coating thickness is around 1/2 to 3/4 inches while the finishing coat will be around 3/16 inches thick. The surface of the rendering preferably wetted before application of plastering. Rough surface plastering is usually used outdoor to resist harsh weathering. Smooth surface plastering with pores and easily defected characteristic is preferably used indoor.


Activity 2: First floor plastering (Grid 1- Grid 4)
Duration: 14-21 days (interior and exterior)
Materials: cement plaster, skim coat
Equipment: buckets, cement spatula trowels, groovers, edgers, planks, sponges, scaffolding, plaster spray
Skilled Workers: general workers (2), plasterers(3)
Technical information: The plaster layer is not more than half inches, and left for drying about 7 days before the finishing is applied. The surface of the rendering preferably wetted before application of plastering. Rough surface plastering is usually used outdoor to resist harsh weathering. Smooth surface plastering with pores and easily defected characteristic is preferably used indoor.
Week 42
Activity 1: First floor plastering (Grid 4- Grid 4a)


Duration: 14-21 days (interior and exterior)
Materials: cement plaster, skim coat
Equipment: buckets, cement spatula trowels, groovers, edgers, planks, sponges, scaffolding, plaster spray
Skilled Workers: general workers (2), plasterers(3)
Technical information: The plaster layer is not more than half inches, and left for drying about 7 days before the finishing is applied. The first coating thickness is around 1/2 to 3/4 inches while the finishing coat will be around 3/16 inches thick. The surface of the rendering preferably wetted before application of plastering. Rough surface plastering is usually used outdoor to resist harsh weathering. Smooth surface plastering with pores and easily defected characteristic is preferably used indoor.
Week 43
Activity 1: First floor plastering (Grid 4a-6)
Duration: 14-21 days (interior and exterior)
Materials: cement plaster, skim coat
Equipment: buckets, cement spatula trowels, groovers, edgers, planks, sponges, scaffolding, plaster spray
Skilled Workers: general workers (2), plasterers(3)
Technical information: The plaster layer is not more than half inches, and left for drying about 7 days before the finishing is applied. The surface of the rendering preferably wetted before application of plastering. Rough surface plastering is usually used outdoor to resist harsh weathering. Smooth surface plastering with pores and easily defected characteristic is preferably used indoor.


Activity 2: Second floor plastering (Grid 1-Grid 4)
Duration: 14-21 days (interior and exterior)
Materials: cement plaster, skim coat
Equipment: buckets, cement spatula trowels, groovers, edgers, planks, sponges, scaffolding, plaster spray
Skilled Workers: general workers (2), plasterers(3)
Technical information: The plaster layer is not more than half inches, and left for drying about 7 days before the finishing is applied. The surface of the rendering preferably wetted before application of plastering. Rough surface plastering is usually used outdoor to resist harsh weathering. Smooth surface plastering with pores and easily defected characteristic is preferably used indoor.
Activity 3: Ground Floor Tiling (Grid 13- Grid 17)


Duration: 14-21 days
Materials: Ceramic tiles, Cement mortar, Silicone sealant
Equipment: Spirit level (1), Groovers (3), Tile cutter (1), Carpenter’s square (1)
Skilled Worker: General worker (2)
Technical Information: Tiles are precisely measured according to the application area of the building. This can help to save number of tiles and as well able to maximize the applying area. The tile will be cut into varies sizes and shapes to fit those with smaller surface area.
Week 44
Activity 1: second floor plastering (Grid 4-4b)


Duration: 14-21 days (interior and exterior)
Materials: cement plaster, skim coat
Equipment: buckets, cement spatula trowels, groovers, edgers, planks, sponges, scaffolding, plaster spray
Skilled Workers: general workers (2), plasterers(3)
Technical information: The plaster layer is not more than half inches, and left for drying about 7 days before the finishing is applied. The first coating thickness is around 1/2 to 3/4 inches while the finishing coat will be around 3/16 inches thick. The surface of the rendering preferably wetted before application of plastering. Rough surface plastering is usually used outdoor to resist harsh weathering. Smooth surface plastering with pores and easily defected characteristic is preferably used indoor.
Activity 2: Ground Floor Tiling (Grid 10-13)


Duration: 14-21 days
Materials: Ceramic tiles, Cement mortar, Silicone sealant
Equipment: Spirit level (1), Groovers (3), Tile cutter (1), Carpenter’s square (1)
Skilled Worker: General worker (2)
Technical Information: Tiles are precisely measured according to the application area of the building. This can help to save number of tiles and as well able to maximize the applying area. The tile will be cut into varies sizes and shapes to fit those with smaller surface area.
Week 45
Activity 1: Second floor plastering (Grid 4b-6)

Duration: 14-21 days (interior and exterior)
Materials: cement plaster, skim coat
Equipment: buckets, cement spatula trowels, groovers, edgers, planks, sponges, scaffolding, plaster spray
Skilled Workers: general workers (2), plasterers(3)
Technical information: The plaster layer is not more than half inches, and left for drying about 7 days before the finishing is applied. The first coating thickness is around 1/2 to 3/4 inches while the finishing coat will be around 3/16 inches thick. The surface of the rendering preferably wetted before application of plastering. Rough surface plastering is usually used outdoor to resist harsh weathering. Smooth surface plastering with pores and easily defected characteristic is preferably used indoor.
Activity 2: Ground Floor Tiling (Grid 8- Grid 10)


Duration: 14-21 days
Materials: Ceramic tiles, Cement mortar, Silicone sealant
Equipment: Spirit level (1), Groovers (3), Tile cutter (1), Carpenter’s square (1)
Skilled Worker: General worker (2)
Technical Information: Tiles are precisely measured according to the application area of the building. This can help to save number of tiles and as well able to maximize the applying area. The tile will be cut into varies sizes and shapes to fit those with smaller surface area.
Activity 3: First Floor Tiling (Grid 14-17)


Duration: 14-21 days
Materials: Ceramic tiles, Cement mortar, Silicone sealant
Equipment: Spirit level (1), Groovers (3), Tile cutter (1), Carpenter’s square (1)
Skilled Worker: General worker (2)
Technical Information: Tiles are precisely measured according to the application area of the building. This can help to save number of tiles and as well able to maximize the applying area. The tile will be cut into varies sizes and shapes to fit those with smaller surface area.
Week 46
Activity 1: First Floor Tiling (Grid 10-14)


Duration: 14-21 days
Materials: Ceramic tiles, Cement mortar, Silicone sealant
Equipment: Spirit level (1), Groovers (3), Tile cutter (1), Carpenter’s square (1)
Skilled Worker: General worker (2)
Technical Information: Tiles are precisely measured according to the application area of the building. This can help to save number of tiles and as well able to maximize the applying area. The tile will be cut into varies sizes and shapes to fit those with smaller surface area.
Week 47
Activity 1: First Floor Tiling (Grid 8-10)


Duration: 14-21 days
Materials: Ceramic tiles, Cement mortar, Silicone sealant
Equipment: Spirit level (1), Groovers (3), Tile cutter (1), Carpenter’s square (1)
Skilled Worker: General worker (2)
Technical Information: Tiles are precisely measured according to the application area of the building. This can help to save number of tiles and as well able to maximize the applying area. The tile will be cut into varies sizes and shapes to fit those with smaller surface area.
Activity 2 : Second Floor Tiling (Grid 10 – Grid 13)


Duration: 14-21 days
Materials: Ceramic tiles, Cement mortar, Silicone sealant
Equipment: Spirit level (1), Groovers (3), Tile cutter (1), Carpenter’s square (1)
Skilled Worker: General worker (2)
Technical Information: Tiles are precisely measured according to the application area of the building. This can help to save number of tiles and as well able to maximize the applying area. The tile will be cut into varies sizes and shapes to fit those with smaller surface area.
Week 48
Activity 1: Second Floor Tiling (Grid 8- Grid 10)


Duration: 14-21 days
Materials: Ceramic tiles, Cement mortar, Silicone sealant
Equipment: Spirit level (1), Groovers (3), Tile cutter (1), Carpenter’s square (1)
Skilled Worker: General worker (2)
Technical Information: Tiles are precisely measured according to the application area of the building. This can help to save number of tiles and as well able to maximize the applying area. The tile will be cut into varies sizes and shapes to fit those with smaller surface area.
Week 49
Activity 1: Finishing – undercoat (Ground floor)

Duration: 21 days
Materials: Wall Sealer
Equipment: Edgers, groovers, screed plank, Paint brushes, Point rollers
Skilled Worker: Painter (5)
Technical Information: Sealer is required to seal the holes, hairline cracks of the walls. The walls are needed to seal to prevent the drywall from absorbing the moisture and the paint. By applying a layer of sealer, it gives the wall an adhesive base for the paint to stick on firmly without having bubbling and waterborne stain.
Week 50:
Activity 1: Finishing – Undercoat (First floor)
Duration: 21 days
Materials: Wall Sealer
Equipment: Edgers, groovers,plank, Paint brushes, Point rollers
Skilled Worker: Painter (5)
Technical Information: Sealer is required to seal the holes, hairline cracks of the walls. The walls are needed to seal to prevent the drywall from absorbing the moisture and the paint. By applying a layer of sealer, it gives the wall an adhesive base for the paint to stick on firmly without having bubbling and waterborne stain.
Activity 2: Painting – Uppercoat (Ground floor)

Duration: 14 days
Materials: Paint
Equipment: Paint brush (3), Point roller (3)
Skilled Worker: Painter (5)
Technical Information: Painting for finishing should be done after the plastering and undercoating are completely dried up to prevent bubbling of the wall due to the moisture. Painting requires few layers for better surface finishes.
Week 51
Activity 1: Finishing – Undercoat (Second floor)

Duration: 21 days
Materials: Wall Sealer
Equipment: Edgers, groovers,plank, Paint brushes, Point rollers
Skilled Worker: Painter (5)
Technical Information: Sealer is required to seal the holes, hairline cracks of the walls. The walls are needed to seal to prevent the drywall from absorbing the moisture and the paint. By applying a layer of sealer, it gives the wall an adhesive base for the paint to stick on firmly without having bubbling and waterborne stain.
Activity 2: Painting – First coat (First Floor)

Duration: 14 days
Materials: Paint
Equipment: Paint brush (3), Point roller (3)
Skilled Worker: Painter (5)
Technical Information: Painting for finishing should be done after the plastering and undercoating are completely dried up to prevent bubbling of the wall due to the moisture. Painting requires few layers for better surface finishes.
Week 52
Activity 1: Painting – First coat (Second Floor)
Duration: 14 days
Materials: Paint
Equipment: Paint brush (3), Point roller (3)
Skilled Worker: Painter (5)
Technical Information: Painting for finishing should be done after the plastering and undercoating are completely dried up to prevent bubbling of the wall due to the moisture. Painting requires few layers for better surface finishes.
Week 53
Activity 1: Doors, Windows and Screens installation


Duration: 10-14 days
Materials: precast aluminum window frames, doors, glass windows panels, door frames, pre-manufactured wooden,wooden crossed screen , screws, sealer
Equipment: Bolts and Nuts, Screwdriver and related toolkit.
Skilled worker: General worker (4)
Technical information: The doors and windows are then installed to the walls, replacing the temporary frames and secured with screws and sealer.
Week 54
Activity 1: Doors, Windows and Screens installation


Duration: 10-14 days (continued)
Materials: precast aluminum window frames, doors, glass windows panels, door frames, pre-manufactured wooden,wooden crossed screen , screws, sealer
Equipment: Bolts and Nuts, Screwdriver and related toolkit.
Skilled worker: General worker (4)
Technical information: The doors and windows are then installed to the walls, replacing the temporary frames and secured with screws and sealer. Prefabricated screen is secured with fixtures and nut onto the walls.
Activity 2: Electrical & Sanitary fittings
Duration: 14 days
Materials: Wall sockets, Wall plugs and bathroom porcelain appliances
Equipment: Bolts and Nuts, Screwdriver and related toolkit.
Skilled worker: General worker (4)
Technical information: Standard electrical appliances are then fixed during the last phase.
Week 55
Activity 1: Pavings

Duration: 10-15 days
Materials: paving stones, bricks, Concrete Grade 30, reinforcements, timber formworks,plank
Equipment: wheel barrow, Concrete Mixer(1), (1), table saw
Skilled Workers: general workers (4)
Technical information: Paving stones to be laid on the soil as pavement of walkway, parking, and garden.
Week 56
Activity 1: Pavings
Duration: 10-15 days (continued)
Materials: paving stones, bricks, Concrete Grade 30, reinforcements, timber formworks,plank
Equipment: wheel barrow, Concrete Mixer(1), (1), table saw
Skilled Workers: general workers (4)
Technical information: Paving stones to be laid on the soil as pavement of walkway, parking, and garden.
Week 57
Activity 1: Grass turfing – External work

Duration: 7 days
Materials: lawn turf rolls (depends on the size of garden), bricks
Equipment: wheel barrow, gardening tool kits, water pipes
Skilled Workers: lawn turf layers(2), general workers (2)
Technical information: Soil preparation is done before laying the rolls of grass turf on the soil surfaces. Excavated soil can be reused as the base of the courtyard. Loose stones and building rubble will prevent the turves roots from making contact with the soil and could make the turf die in patches. The top soil should then be thoroughly rotivated down to about the first 6 inches to aerate it properly. It is then raked level and gently treaded down.